Cooky Jason’s World Famous Apple Pork Stew

Cooky Jason’s World Famous Apple Pork Stew:

Got 3 hours to kill? Find ‘em. This is worth it. At home or at the campsite, you’ll be a hero. Stews come in all shapes and sizes. But pork loves apples and we love both. It’s a match made in camping euphoria. Follow along…

Major players:

  • 1 4-5 pork roast
  • ½ cup olive oil
  • 2 red onions, peeled and chopped
  • 8-10 garlic cloves, minced
  • 2 large green apples, peeled/cored cut into large slices
  • 3 large carrots, chopped
  • 12-16oz large mushrooms, quartered
  • 3 stalks celery, sliced thick
  • 4 sprigs each of rosemary and thyme
  • Salt and pepper to taste
  • 2 cups chicken or vegetable stock (homemade is always best)
  • 2 Tbsp. butter (no margarine)
  • Dash of chopped chives per serving

Heat your favorite Dutch oven or stock pot over medium-high heat and add olive oil. Brown pork roast on all sides, about a minute or two per side. Toss in the onions and apples about half way through. We want them to brown, too. But the time it takes to brown all sides of the roast is too long for the onions and apples. Then add the stock, salt and pepper, butter, and herbs. Lower heat. (If cooking over a fire, move it to the side so it’s not over direct heat but still hot enough to simmer.) Cover and simmer for 2 and a half hours.

(*Take it up a notch: add 1 and a half cups red wine)

Remove lid and add mushrooms, garlic, carrots, and celery. Recover lid and simmer an additional 30 minutes. Remove from heat and serve hot. The herb sprigs are easy enough to fish out with tongs. Sprinkle each serving with chopped chives.

That’s how we do it, folks.

Questions/comments/requests/suggestions/limericks/thoughts on life/childhood stories? Feel free to drop me a line at jasonr@pahaque.com.

The Gear Doctor – May 2015

The Gear Doctor

Fabulous First Aid Kit

The most important piece of equipment for a camping trip is your First Aid Kit.  I’ve made some suggestions below for a “Fabulous First Aid Kit” that will help make your trip more enjoyable, rather than having to rush to a doctor’s office.

LIST

Band-Aids of all shapes and sizes

Gauze pads (4” x 4”) and tape

Small scissors

Tweezers

Kotex pad (absorbs large qtys of blood for bigger wounds)

Aloe gel for sunburn

“Butterfly” bandages for deep cuts

Pain relief medications (Tylenol, aspirin, Ibuprofen)

Ace bandage

Splint (can be makeshift from paint can stir sticks)

Alcohol/Hydrogen peroxide or swabs

Cotton balls

Sling (a large handkerchief will do nicely!)

Moleskin and/or Nuskin (found at drug stores) for blisters

Baking soda and calamine lotion for insect bites

It’s always best to include a First Aid Manual and familiarize yourself with some of the basic procedures.  Remember that cuts should have firm pressure put on them before bandaging, to help stop the flow of blood.  If bloodflow cannot be stopped, it’s time to get to a hospital pronto.  Place the affected area above the heart while transporting the patient.  NEVER place any creams or oils on burns.  Always use cool water and wrap with a loose gauze bandage until you can see a doctor.  Ace bandages are great for sprains;  use a painter’s stir stick and wrap against the sprain if you suspect a broken bone.  No walking on a suspected broken ankle!  Fevers can be lowered with analgesics and a cool wash cloth to the head.  Drink plenty of water when camping (not just beer!), as being outdoors can dehydrate you quickly.  Always bring water bottles on hikes.

Having a first aid kit along on your trip will allow you to “fix what’s broken” along the way, and get you back to lounging in your favorite chair.  The Gear Doctor brings wine on every camping trip as first aid for relaxation……  J

Happy Camping and enjoy the outdoors!

We are very pleased to have Anita Hudson Easton back on our writing staff as author of our monthly Gear Doctor.  Anita is a 30 year veteran of the Outdoor Industry and is an expert in the design, manufacturing, care and maintenance of outdoor gear!

Celestial Navigator – March 2015

Sky Maps and Smartphone Apps

Stargazing for Dummies

How many among us can look up at the night sky and point out prominent stars, planets, and other heavenly wonders, purely from memory?  Certainly there are some of us who are blessed with the ability to discern patterns and locations in what appears to the rest of as a completely random and endless sky full of white dots.

Even if you are not one of ‘them’, the celestial know-it-all’s, there are still simple ways to enrich your star gazing experience with the use of a few simple, and free, tools available online and elsewhere.  Here are a few of our favorites:

Sky Maps  – There are several sites that offer free downloads of printable sky maps – our favorite is http://www.skymaps.com/downloads.html   We like to use these in remote areas where other cellular or GPS based maps may not be accessible.  Printed sky maps are easy to use – simply hold them overhead, orient it to north, and you can easily sky mapstart to match up stars with your map.  Next thing you know, you’re finding constellations and planets and nebulae, and the sky patterns will begin to reveal themselves to you.

Smartphone Apps  –  These take printed sky maps to a whole new and interactive level. Working on the same principle of holding your phone overhead to align your screen with the stars, these apps can detect your location, zoom in or out, and show outlines of constellations.  The apps we prefer are: Google Sky Map, Sky Safari, and Sky Map. All are available through the App or Play Stores, and are free in their basic versions.  All of them will place more celestial knowledge at your fingertips than Copernicus had on his best day.

Also available to the amateur stargazer are affordable, GPS-guided telescopes, that combine all the functionality of the Smartphone Apps with telescopic power.  Now you can identify celestial objects, and see them up close.  Most of these telescopes start in the $400 range, and can exceed upwards of $4000.  Experience has shown us tetx-at-tchat the less expensive telescopes are more than sufficient.  Unless you want to explore deep-space objects, most telescopes will only turn small white dots into slightly larger white dots, and therefore the extra expense is not justified.  For viewing closer objects such as the moon and planets, smaller and less-expensive is the way to go.  Our favorite for many years is a slightly older version of the Meade ETX80, which starts around $300 (http://www.meade.com/products/telescopes.html?cat=16)


Cooky Jason’s December Recipe – Sausage Hodepodge

This is a simple recipe that can be a main course OR a side dish. It’s perfect for chilly nights around the campfire and, you can do most – if not all, of the prep at home ahead of skillet-sausage-and-potatoes-38009-ss
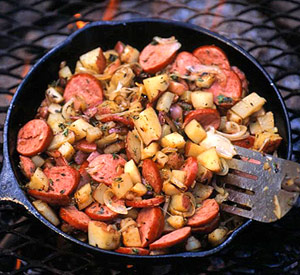
time. Sage and cranberries make it a great way to make the house or the campsite smell like the season. Happy Holidays!

Fixins’:

  • 1 pound smoked sausage (take your pick here), cut into 1 inch pieces
  • ½ pound red or white potatoes (or purple if you can get them), quartered
  • 1 large onion, sliced
  • ¾ pound fresh green beans, trimmed and halved
  • ½ pound mushrooms (whit, crimini, oyster, etc…) sliced
  • 1 cup dried cranberries
  • ½ cup sage, finely shredded
  • 4 or 5 cloves garlic, minced
  • 1 tsp ground pepper (black or white)
  • 1 tsp salt
  • 1 Tbsp. butter
  • 1 Tbsp. olive oil
  • 1/3 cup water

I suggest cooking the sausage through first, letting it cool, and then slice into 1 inch pieces. You can definitely do this at home if you like, to save time at the camp site. And if you already have the veggies sliced, even better.

On a large sheet of foil, place the green beans, potatoes, onion, mushrooms, garlic, cranberries, sage, and sausage. Season with salt and pepper, sprinkle with oil, and top with butter. Tightly seal foil around the ingredients, leaving only a small opening. Pour water into the opening, and seal.

Place foil packet on the prepared grill. Cook 20 to 30 minutes, turning once, until vegetables are tender. Feel free to sprinkle on some parmesan or asiago cheese before serving. Enjoy!

Questions/comments/requests/suggestions/limericks/thoughts on life/childhood stories? Feel free to drop me a line at jasonr@pahaque.com.

WHAT’S IN A NAME?

PahaQue is not just a name, and although rooted in lore, it is something even more than just the meaning of the words.  It is a way of life, or at the very least, a way of looking at life. It is about experiencing and enjoying the great outdoors with family and friends.  It is about understanding the history of the land, and it is about the peace and solitude that can only be found in the places less affected by modern humankind.

No matter where you live and where you camp, history can be found everywhere.  From the Native Americans who once roamed every square foot of this land, to pre-historic animals, and even further back in time, the natural history of our land is all around.  But nowhere is it more visible than in nature.  To find it however, you must know where to look, and what you are looking for.

One easy way to begin to understand the history of the land is to learn about the plant and animals that inhabit the areas in which you camp.  Learn how the previous inhabitants found usefulness in everything, and you will learn how a certain type of tree was once critical to a certain tribe’s existence, perhaps for medicinal or spiritual purposes, or how that tree may have aided in the existence of certain bird or other plant species.

Aside from living examples of history, another way to understand the history of the land is to find more tangible relics.  Arrowheads usually come to mind first.  Almost anyone who has ever camped has found an arrowhead or knows someone who has.  Learning more about arrowhead types specific to your favorite camping area can provide much information about what types of game were hunted, how they were hunted, and even the time period of their use.  Cave drawings or other forms of pictographs are another exciting example of tangible evidence left by pre-historic inhabitants, thus providing yet another excellent learning opportunity.  Historic structures from our forefathers, particularly when preserved as a museum, provide still another source of information about the land, from yet another group of previous inhabitants who struggled to carve out an existence in a once harsh land.

Whether you camp in campgrounds or backcountry wilderness, the opportunities to learn more, and therefore further your appreciation of the land and its history, are all around you.  It may be just a short hike, or a day trip away from camp, but seeking out  opportunities to learn more about the natural history of the area you camp in is not only a great experience for kids and adults alike, but it also makes for great after dinner conversation around the camp fire.

Kids especially seem fascinated with the tales of frontier life and struggles, of Indian fights, of the trappers, hunters and other pioneer frontier folk that settled the land.  The stories come to life even more when they happened in the vicinity of your camp.  At night it is easy to imagine yourself in another time, and history makes great material for fire-side stories.  And perhaps with this understanding of natural history comes a deeper appreciation of the outdoors.

This is just one aspect of the meaning of PahaQue – the camping lifestyle.  Whatever you choose to call it, it all adds up to one thing – WE LOVE CAMPING!  It’s our way of life.

Oh, and for the ‘official’ definition of our name click here

Hope to see you ’round the campfire soon!

Happy Trails,

Jeff

Celestial Navigator – August 2014

There are few things more enjoyable during a night in camp than staring at the night sky.  Now you can be a celestial expert and dazzle your camp mates with your night sky knowledge.  There’s lots going in the July night sky, so grab your telescope and your tent and get out there!

  • August 10 – Full Moon. The Moon will be directly opposite the Earth from the Sun and will be fully illuminated as seen from Earth. This phase occurs at 18:09 UTC. This full moon was known by early Native American tribes as the Full Sturgeon Moon because the large sturgeon fish of the Great Lakes and other major lakes were more easily caught at this time of year. This moon has also been known as the Green Corn Moon and the Grain Moon. This is also the closest and largest full Moon of the year, an annual event that has come to be known as a “supermoon” by the media. The truth is that it is only slightly larger and brighter than normal and most people are not really able to tell the difference.
  • August 12, 13 – Perseids Meteor Shower. The Perseids is one of the best meteor showers to observe, producing up to 60 meteors per hour at its peak. It is produced by comet Swift-Tuttle, which was discovered in 1862. The Perseids are famous for producing a large number of bright meteors. The shower runs annually from July 17 to August 24. It peaks this year on the night of August 12 and the morning of August 13. The waning gibbous moon will block out some of the meteors this year, but the Perseids are so bright and numerous that it should still be a good show. Best viewing will be from a dark location after midnight. Meteors will radiate from the constellation Perseus, but can appear anywhere in the sky.
  • August 18 – Conjunction of Venus and Jupiter. Conjunctions are rare events where two or more objects will appear extremely close together in the night sky. The two bright planets will come unusually close to each other, only a quarter of a degree, in the early morning sky. Also, the beehive cluster in the constellation Cancer will be only 1 degree away. This rare, double-planet event is definitely one not to miss. Look for the bright planets in the east just before sunrise.
  • August 25 – New Moon. The Moon will be directly between the Earth and the Sun and will not be visible from Earth. This phase occurs at 14:13 UTC. This is the best time of the month to observe faint objects such as galaxies and star clusters because there is no moonlight to interfere.
  • August 29 – Neptune at Opposition. The blue giant planet will be at its closest approach to Earth and its face will be fully illuminated by the Sun. This is the best time to view and photograph Neptune. Due to its extreme distance from Earth, it will only appear as a tiny blue dot in all but the most powerful telescopes.

The Art of Getting Kids Outdoors

My generation had an extensive range from home base.  We’d disappear for a day.  No helicopter parents, no cell phones.  If we crashed our bikes, we fixed them as best we could and limped home.  I took a nice header five miles from home (I still have the scar on my knee), used a t-shirt as a bandage, made it home, and from there to the emergency room. I got 8 stitches and a great story to tell my friends.

As the owner of a company which produces family camping tents, I am often asked, “When is the best time to start taking kids on outdoor excursions?”

My answer is always the same: on the way home from the hospital. We owe it to our kids to get them outside.  We owe them scratches and scrapes, summits and snakes, sunburns and sunsets.  We owe them an authentic life.

Practical Matters

Kids are not little adults.  Their needs are very different, and if you want to enjoy your time with kids, pay attention.  There are five things I tell people when they ask about taking kids camping:

o   They get cold faster.

o   They get hot faster.

o   They get hungry faster.

o   They get bored faster.

o   They want to be helpful.
They get cold faster.  It’s simple thermodynamics. Little bodies lose heat faster than big ones.  They get cold before you do, so don’t assume because you’re not cold that your little ones aren’t either.  The solution is easy.  Take more clothing than you think necessary.  Because their clothes are smaller, it’s no big deal, and after a certain age (around six for our kids) they started carrying a lot of their own clothes and gear.

The first line of defense is good outerwear.  Make sure it fits: boots, raingear, hats, gloves, etc.  The difference between a good raincoat and a poncho is not worth it, especially when you have a wet and tired and hungry five-year-old.

They get hot faster.  Keeping kids comfortable in the heat is just as important as keeping them warm. Again, you may not notice because you’re not hot. A red flushed complexion is a good sign things are toasty.  Make use of evaporative cooling.  A baseball cap dipped in water can cool them off quickly, and a wet bandana around the neck is helpful too.

It goes without saying that many adults forget to apply (or reapply) sunscreen.  If you forget, chances are it’s not even on your kid’s radar.  Make it a point to reapply every hour, even if it’s just a touch-up.

They get hungry faster.  That’s probably not exactly true, but it is a fact that kids will not tolerate hunger as well as an adult.  Count on feeding them snacks throughout the day as well as good sized portions at breakfast and dinner.  Keeping high-energy snacks handy is critical and can help avoid meltdowns.

They get bored faster.  This is especially true with passive activities when they’re younger, like sitting in a canoe while Mom and Dad do all the work.   While in camp, have lots of quick, easy and fun activities to keep kids engaged and to prevent boredom.  Finding cool bugs, or looking for different colored rocks are examples of simple, but engaging  activities for kids.  Coloring books, plain white notebooks and crayons and colored pencils are great.  Anything to stimulate their minds.

They want to be helpful.  Kids want to be part of the action, and there are lots of fun duties that will make them feel like they are little campers.  At four, a kid can collect twigs for tinder; at six, pump a water filter.  At eight, they can help start the fire, and at ten they can start the fire themselves.  At twelve they help with dinner; by fourteen they’re cooking dinner. Kids want to be useful.  Resist the temptation to do everything because it’s faster.

About Safety and Risk

Taking these axioms and applying them without an eye toward safety is foolhardy.  Clearly, you want to pay attention to safety, but realize that there is inherent risk in outdoor activities.  The key is to minimize risk through education.

If you are going more than a 9-1-1 call from help, you’ll want some training.  Wilderness First Aid (WFA) is a weekend course designed to give you a basic understanding of dealing with injuries and other mishaps that happen outside.  If you’re hard core, the Wilderness First Responder (WFR) is an eight-day comprehensive course that teaches you how to provide some pretty serious aid while waiting for the professionals.  If you’re an EMT, there is specialized training for you to fill in the gaps when it comes to wilderness.

Some folks still question my sanity for taking my kids into wilderness areas.  My response is that I minimize risk through planning, education and keeping my wits about me.  I also tell them that the risks of not taking my kids to the rivers and woods are far higher than if I take them.  Risk cannot be eliminated, but it can be managed.  Only a foolish person faces the wilderness with a

pocket knife, a piece of twine, and a can-do attitude.  A wise person educates themself, teaches others, and shares their knowledge and love of the outdoors generously and graciously.  After all, we all had a mentor who taught us our skills.  It is only right that we pass them on to the next generation.


Cooky Jason’s July Recipe: Camping Scalloped Potatoes

Who doesn’t love scalloped potatoes? These can be prepped ahead of time and transported to the campsite in zip-top bags or plastic storage bowls. Once again we’re “pouching” here. So this can be done on a grill, over an open campfire, or at home in the oven. This is the basic recipe, but feel free to experiment with different cheeses, combinations of cheeses, and fresh herbs.

Major Players

· 6 large russet potatoes, sliced into 1/8 inch thick slices
· 6 green onions, sliced
· 1 ½ cups shredded cheddar
· 1 ½ cups heavy cream
· 1 cup diced mushrooms (note: you can substitute the cream and mushrooms with 1 10oz can cream of mushroom soup)
· ½ cup butter
· ½ cup crumbled bacon (cooked crispy)
· 8 to 9 garlic cloves, finely chopped
· 1 cup parsley, finely chopped
· ¼ cup olive oil
· ½ cup butter
· Salt and pepper to taste

Down to business:

Combine the potatoes, green onions, cheddar, garlic, parsley, heavy cream and mushrooms (or 10oz can cream of mushroom soup), bacon, salt and pepper, and olive oil in a large bowl or zip-top bags. (It may take more than one zip-top bag. That’s also a perfect way to transport this.) Tear off 6 to 8 squares of aluminum foil. Add a pad of butter to each and then evenly distribute the potato mixture among the foil squares. Seal the foil squares and place on medium heat for about 20 to 25 minutes. Serve…

How about a game changer?

Combine all ingredients but leave the potatoes out until ready to cook. When ready, brush the potatoes with olive oil and grill on each side for about 3 minutes, until you see grill marks. Then add them back to the cheese mixture and proceed as before. Add a few pinches of cayenne pepper. Done.

Questions/comments/requests/suggestions/limericks/thoughts on life/childhood stories? Feel free to drop me a line at jasonr@pahaque.com.

Celestial Navigator – July 2014

There are few things more enjoyable during a night in camp than staring at the night sky.  Now you can be a celestial expert and dazzle your camp mates with your night sky knowledge.  There’s lots going in the July night sky, so grab your telescope and your tent and get out there!

July events:

July 12 – Full Moon. The Moon will be directly opposite the Earth from the Sun and will be fully illuminated as seen from Earth. This phase occurs at 11:25 UTC. This full moon was known by early Native American tribes as the Full Buck Moon because the male buck deer would begin to grow their new antlers at this time of year. This moon has also been known as the Full Thunder Moon and the Full Hay Moon.

July 26 – New Moon. The Moon will be directly between the Earth and the Sun and will not be visible from Earth. This phase occurs at 22:42 UTC. This is the best time of the month to observe faint objects such as galaxies and star clusters because there is no moonlight to interfere.

July 28, 29 – Delta Aquarids Meteor Shower. The Delta Aquarids is an average shower that can produce up to 20 meteors per hour at its peak. It is produced by debris left behind by comets Marsden and Kracht. The shower runs annually from July 12 to August 23. It peaks this year on the night of July 28 and morning of July 29. This should be a great year for this shower because the thin crescent moon will set early in the evening leaving dark skies for what should a good show. Best viewing will be from a dark location after midnight. Meteors will radiate from the constellation Aquarius, but can appear anywhere in the sky.

excerpts from seasky.org

The Gear Doctor for July 2014

The old adage, “Take care of your equipment and it will take care of you” is an important truth to live by for campers, and one that is seldom more true than when it comes to your tent. At the end of a long day you’ll want your tent to be clean, comfortable and able to adequately protect you from the elements. Follow the suggestions below and you’ll have a tent that will take care of you and give you years of service.

When you get a new tent, always open it and set it up before you take it out in the wild. This allows you to practice setting up your tent and become familiar with the procedure before heading out into the wild.

Proper Storage – Let’s face it, unless you’re camping every weekend or hiking around the country, your tent will spend the majority of it’s life in storage. Proper storage will help extend the life of your tent.

1. Make sure it’s dry – nothing will start the downward trend of degradation in your tent like the mold and mildew caused by storing it when it’s not completely dry. If circumstances force you to break camp in the rain or when the tent is still damp, take it out and set it up to dry and air out as soon as you can.

2. Fold or roll it differently – folding your tent, or even rolling it, the same way every time you store it will cause creases to develop. Over time, those creases can and will result in damages to the material.

3. Store the poles and stakes in their own bags – every tent I’ve ever seen has a separate storage bag for the poles and stakes. Use them. Otherwise you could poke a hole or cause a rip in your tent.

At the Campsite – following a few simple guidelines will help prevent damage and extend the life of your tent.

1. Check your campsite before pitching your tent – make sure you’re not placing your tent on top of rocks, roots or uneven ground that can cause damage to your tent and an uncomfortable night for you, and that the nice, flat, smooth area you find is not the lowest point on the campsite. Otherwise you could be flooded out in a storm when all the water runs downhill into your tent.

2. Use a custom footprint – this helps protect the exterior floor of the tent as well helping to prevent water from gathering under the floor.

3. Keep it clean – Inside. Remove your footwear at the door to avoid tracking dirt and water inside the tent. The new PahaQue TentRugs add a layer of protection, comfort and warmth to your tent floor, and make cleaning out your tent super easy!

4. Keep it clean – Outside. There is almost no way to avoid getting dirt, stains, bird droppings, tree sap droppings and lots of other various things on the exterior of your tent. Always use clean water and a soft rag or sponge to clean up those stains or dirt as soon as possible.  Mild detergents are okay but be careful not to damage the tent fabric coatings.

5. Make repairs as soon as you see the problem – keep a tent repair kit on hand which contains at least a tube of seam-sealer, fabric repair tape,

Your tent is your shelter in bad weather and your protection from the elements in the great outdoors. With proper care, a quality tent can last many years and provide you with many days and nights of clean, warm, comfortable shelter