Winter Camping Tips

Winter isn’t officially here for a few more weeks, but the mercury is dropping and most regions have already received their first snowfall. Some of our customers prefer to stay home bundled up in the winter, but we know we still have a few hardcore campers who want to take the family out and camp all winter. So whether you want to go tent camping or take out the travel trailer, we’ve got some tips for you. Some of these winter camping tips may seem obvious, but there are probably some great tips here that are new to you.

 Additional gear to pack: When it’s cold outside, you’ll obviously need more, and warmer clothes. Be sure to pack layers so that you can add or remove those layers as the temperature and your activity levels change. If you are tent camping, and there might be snow, be sure to pack some snow stakes. A normal ground stake won’t hold in any snow, but a snow stake is designed to hold your tent and guy lines firmly in place, even when there is no dirt to grab onto.. Also, be sure to remember that when you are sleeping on the ground, what’s underneath is as important as what’s on top of you. So make sure you have a good sleeping pad. A PahaQue TentRug will keep your tent clean as well as provide an extra layer between you and the ground. The early sunsets also mean you’ll want to have a nice headlamp to see your way around after dark. A book or a set of playing cards can also help keep you occupied once the sun goes down.

cards-416960_1920.jpg

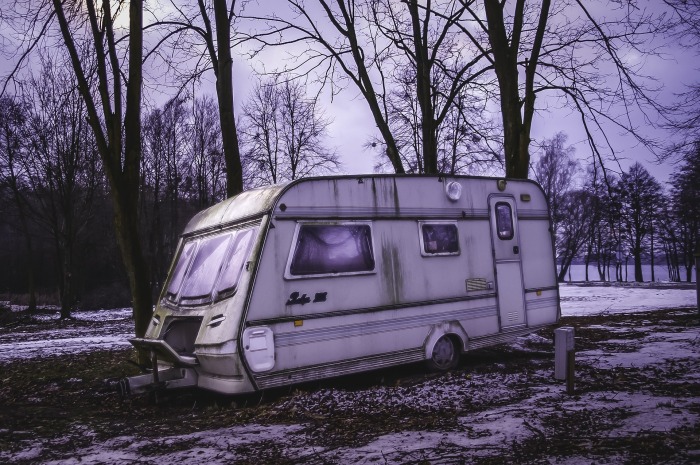
When choosing a camping spot: Look for wind protection. A natural wind block, like trees, hills or even big boulders can cut down on the wind and make your winter camping experience a little more comfortable. You should also look for where the sun will rise and try and position your trailer or tent to catch the morning sun, so you can take advantage of those warming rays. If you are in an area with snow, be sure to watch out for trees with dead or dying branches, as the weight of the snow would be the final straw that causes those branches to break. You don’t want to be set up underneath when that happens. winter-2683845_1920(1).jpg


For trailer and RV campers: Consider installing heavy drapes in your rig. They will provide extra insulation to keep the warm air in and cold air out. If the temperatures are going to be much below freezing consider adding skirting to cut down on the wind underneath your camper. In extreme situations you can even put a small space heater underneath to keep those pipes from freezing.  Of course you’ll also want to make sure you’ve tested your heater before you head out, and an extra bottle of propane will come in handy when your heater is going practically non stop. 459px-Propane_tank_20lb

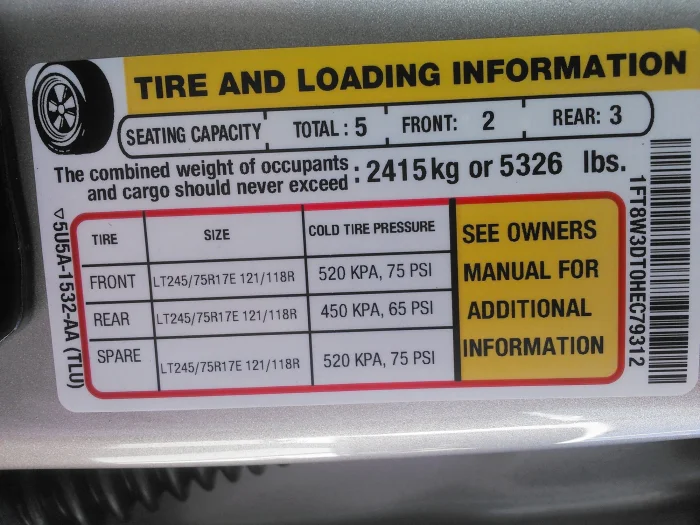
For your car, RV, or tow vehicle: One thing you should never leave without is snow chains. It’s possible you’ll pack them and never use them, but it’s always better to have them and not need them, then need them and not have them. A tow strap can be very handy as well, you can use it to rescue someone else, or to be pulled out of trouble yourself. It’s always a good idea to have some warm clothes as well as water and snacks easily accessible in the vehicle as well. Winter weather can be treacherous at times, and if you get stuck on a mountain road or in a ditch, you could be waiting quite a while for help. Food, water, and clothing can make the difference between a nightmare scenario and a merely unpleasant one. snow-chains-3029596_1920.jpg


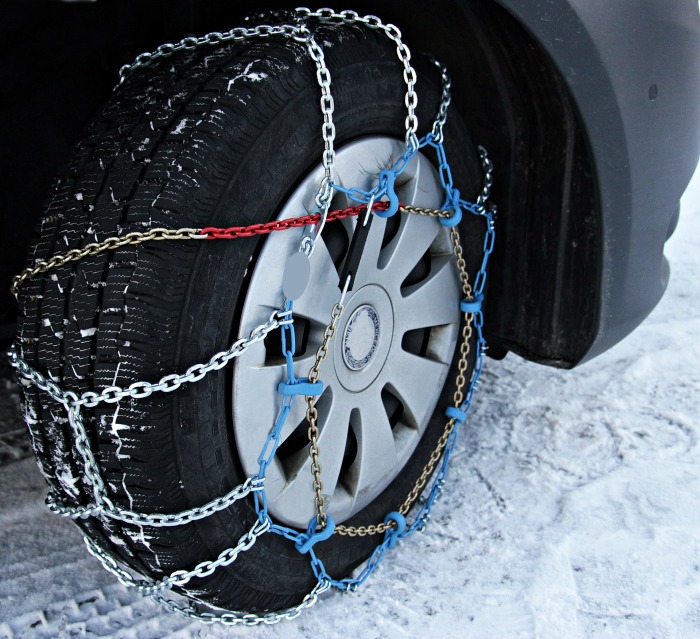
What do you think of our tips?  Do you have any winter camping tips of your own? Let us know your favorite  winter camping tips and tag us on us on Facebook or Instagram.


.


Great fall Camping spots

Fall is in full swing. The leaves are changing and the temperatures are falling. The days may be getting shorter, but camping in the fall has many advantages. You can usually avoid the summer heat, and the winter cold hasn’t set in. But the best part of fall camping may be the lack of crowds. Spots that are packed full of tourists and families can be practically empty this time of year. You’ll have your choice of camping spots, and won’t have to wait in line to get in and out of parks, use a dump station, and more. So we thought we would share some of our favorite fall camping spots.


Blue Springs State Park in Florida: Blue Springs State Park is about an hour north of Orlando or 2 hours south of Jacksonville. The park has tent and RV camping spots as well as a few cabins. There is panty to do in the park. You have the standard hiking and campfire acitivites, but you can also kayak, canoe and fish. But the most unusual thing about this park may be the manatees. The warm waters of the park’s natural springs attract these graceful animals, as they seek refuge from colder waters. As many of 500 manatees swim in the ⅓ mile section of the crystal clear St Johns River. The best time to view these creatures is from mid November to mid January.

Blue Springs State Park Websitemanatee-1079929_1920


Anza-Borrego State Park in California: At 600,000 acres, this is the largest state park in California. The park is named after the spanish explorer, Juan Bautista de Anza, and the spanish word for bighorn sheep. Look carefully at the side of the mountains and maybe you’ll catch a glimpse of these well camouflaged  “ borregos”. But rest assured that whether you see them or not, the bighorn sheep are there. The park also features roadrunners, golden eagles, and tons of other desert wildlife. This is desert camping so the air is dry, it’s warm during the day, and chilly at night. There are plenty of hiking and off-road trails in the area and you can even hike a section of the PCT. You definitely wouldn’t want to camp here in the middle of the summer. So fall is the perfect time of year for this campground.

Anza Borrego State Park Websitedesert-bighorn-sheep-896910_1280


Hocking Hills State Park Ohio: Hocking Hills State Park has mile upon mile of hiking around beautiful waterfalls, caves, and gorges. The The park is bathed in lush green foliage. (Very different from Anza Borrego!) and is beautiful any time of year. Be sure to do the hike to “Old Man’s Cave”. Apparently named after and hermit who lived and then died in the cave. His remains were reburied at a new location, but some say the cave is still haunted by the old hermit and his dog. A short half mile hile from the camping area will also get you to Whispering Cave, where the 105 foot waterfall flows on onto the floor below or the Hemlock trail with its swinging bridge that crosses Old Man’s Creek. Just try not to look down.

Hocking Hills State Park Website

state-parks


Do you have a favorite Fall camping spot?  Tell us your favorites and tag us on us on Facebook or Instagram.

Cookie Jason’s Sage Roasted Pork

OK, time for the first fall recipe of the year! It’s fall time now, my favorite season, and being a seasoned foodie it’s definitely my favorite time of the year for cooking AND camping. It’s time for pumpkin-spice EVERYTHING. But the warming euphoria of the aroma of cinnamon, sage, pine, and other holiday staples is what really drives the fall season mood in my opinion, and we’re going to use a couple of those here.

Boneless country style pork ribs are my personal favorite. They’re super tender and easy to grill. But any cut of pork will work just great. If you’re using pork chops, make sure they’re at least an inch thick. And this will be a double cooking process. Follow along…

Major Players:

  • 3-4lbs preferred cut of pork
  • 4-5 cloves garlic, crushed and finely minced/diced
  • 1⁄2 cup chopped onion
  • 1⁄2 cup finely shredded/chiffonade sage. Must be fresh sage; no dried stuff from plastic jars here.
  • 1 cup dried cranberries, or 1 1⁄2 cups fresh ones (roughly chopped)
  • Salt and pepper
  • Olive oil
  • 1 Tbsp butter
  • 1⁄2 cup chopped walnuts

Start by grilling the pork just until all sides are browned and you have some nice grill marks on all sides. Make sure you coat the pork in a little olive oil and salt and pepper first. You don’t need to cook it all the way through here. The second part of this is done in foil pouches. Pour a little olive oil on the foil and lay the pork down on top. Then simply add the garlic, onion, sage, cranberries, butter, and chopped walnuts over the pork. Seal it up but leave a slight opening for venting. Let it hang out over medium heat for 25 to 30 minutes. Remove the pork from the foil to a plate to cool, but don’t you dare throw all that wonderfulness in the foil away. No no no… Drizzle the contents over the pork and serve. Sagey goodness abounds. Happy Fall!

Questions/comments/requests/suggestions/limericks/thoughts on life/childhood stories? Feel free to drop me a line at jasonr@pahaque.comsage pork

Check out the new PahaQue Custom website

The PahaQue Custom website was only a few years old, but websites seem to age in dog years, or maybe faster.   We want to keep our websites fast loading and easy to navigate.   We want to make it as easy as possible for you to find a cover for your teardrop trailer, a  visor for your A-Frame trailer,  or an awning for your R-pod.   We make side tents, auxiliary rooms and canopies for many different camper models.   And as our product line has grown and improved, the old site just wasn’t cutting it any longer.  We revamped the PahaQue Wilderness website last year, and we knew the PahaQue Custom website was next.


We are pretty happy with the new site.  The  catalog menu allows you to browse through our different categories, such as Trailer Shades, Trailer Covers, and  Trailer Tents.    You can also find accessories, setup instructions and more.  If you need a cover for your camping trailer or want to create some extra shade with for your T@b, A-frame,  R-Pod, it’s easy to browse our website and find what you need.   Of course we make shademakers, cover,s and tents for many models of camper, way too many to list here.   So just head on over to the new PahaQue Custom website and take a look around.

5 more beach camping tips

Last month, we gave you 5 great beach camping tips, and since it is full on beach camping season, we thought we would share a few more.   Beach camping can be tons of fun, but it does come with it’s own unique challenges.

1: Bring your  own shade.   While you always have the water to cool you off, there usually isn’t much natural shade when camping a the beach.   This means you’ll have to bring your own.  If you are tent camping, then a PahaQue Screen room or Cottonwood Sun Shelter will do the trick.    If you are camping in your travel trailer,  then PahaQue Custom makes shades, visors, canopies and awnings for a wide range of travel trailers.   Weather you have an A frame trailer, a Teardrop, and R-Pod, or something else.  These Shademakers will help you stay cool at the beach.


2: Watch the tides! If you are actually camping on the beach, you’ll want to make sure you are fully inland of high tide.   If you are tent camping, you could wake up to a tent full of saltwater, but if you are camping in a travel trailer, and wind up to close to the surf well…. You could  wind up stuck, and with extensive damage to your pride an joy.   There are several apps out there  that will help you track the tides.  Make sure you use one.

background-2413081_1920
High tide can sneak up on you!


3: Steer clear of the dunes.  Dunes are natures barrier between the water and the inland areas.  They also have unique plant and animal species that  should be left alone.  So generally try to avoid the dune areas when beach camping.

dunes-4033821_1920(1).jpg
Those plants in the dunes protect the beach.


4: Bring extra ice  We mentioned that there isn’t much shade, so it can be hard to keep your perishable items cool.   If you have a travel trailer, you may not have to worry about it.  But tent campers should always have some extra ice on hand, as that cooler won’t be as efficient when the shade is limited.

abstract-18722_1920.jpg
Extra Ice is always handy.


5: Stay hydrated. The sun and the wind will zap that water right out out of you.  And if you  go swimming  in the ocean you’ll become even more dehydrated.   The salty water of the ocean pulls the water right through your skin and  out of your body.  So you should start drinking early and often.   Those cans of beer and wine might be nice, but that don’t do as much to hydrate you as good old fashioned H20.  So be sure to drink plenty of it.

thirst-1474240_1920.jpg
Keep yourself and the kids hydrated

So  we’ve shared  10 beach camping tips with you in the last few weeks.   What are your beach camping tips? Reach out to us on our Facebook page and tell us your tricks.


Five great beach camping tips

Summer isn’t officially her  for a few more days, but the kids are out of school and summer camping season has officially started.  We love camping just about anywhere, and summertime makes for some great beach camping, so we thought we would share 5 beach camping tips:
sea-1804591_1920

1: Apply sunscreen early and often. When you are near the water and the sand, you get sun exposure coming from both directions. The sunlight comes from the sky, but those rays also bounce off the sand and the water and hit you again. We’ve even heard of people getting the underside of their nose burned in some situations! A Shademaker from PahaQue such as a Cottonwood sun shelter or a trailer shade from Paha Que Custom can help cut back on your sun exposure

suncream-1337629_1920

2: Don’t forget the insect repellent. Freshwater beaches will likely have small pools nearby where mosquitoes and other insects can breed, and ocean beach camping can be near freshwater marshes. Washed up ocean vegetation can attract insects such as sand flies and other insects. So make sure you have effective insect repellent (deet is the most effective). If you are in a travel trailer, make sure you keep the windows and screen doors shut. If you are tent camping, be sure the mesh on your tent is made from no-see-um grade mesh that keeps out all those little critters

mosquito-1465062_1920.png

3: Plan for the sand. You will get sand everywhere. It’s a fact. But you can reduce the amount of sand you track into your travel trailer or tent, by wearing shoes or sandals that are easy to remove, by having a small rug or drop cloth at the entrance, and by having a towel nearby to wipe off your feet. For tent campers, a PahaQue Tentrug will make it easier to clean out your tent at the end of your trip.


4: If you are setting up on the sand, you’ll need some extra gear. For trailer campers,, bring some plywood squares to put under your leveling blocks. A typical leveling block will sink into the sand and your trailer will become unstable. Normal tent stakes often won’t hold in the sand, so tent campers may need to use sand stakes or sand bags.


5: Avoid glass bottles. An adult beverage is often an integral part of a camping trip, but glass bottles are a no-no at most beaches, and a cut foot is fast way to ruin a great trip. A wide assortment of quality beverages ( including wine) are available in cans these days. And they haven’t had those removable pop tops that cut Jimmy Buffet’s foot in decades. Be kind to other neighbors and yourself stick to cans.

canned wine
Even wine is available in cans these days.


Do you have any beach camping tips or tricks you would like to share with us? Reach out to us on our Facebook page and tell us your tricks.

Free National Parks Passes for 4th Graders

Yellowstone, Grand Teton, Denali and Big Bend are some of the biggest ones.  Hot Springs,  Indiana Dunes, and Acadia  are some of the smaller ones.  Dry Tortuga is an island version, and Gateway Arch is in the middle of a bustling city.     Our national parks are nothing short of a national treasure.  With over 84 million visitors in 2017, they offer us a chance to camp, hike, bike, and climb.  We love our national parks, and we think  a national parks pass make an excellent gift. But did you know every fourth grader can get a free national parks pass?

The Every Kid In A Park program is simple.  Every single 4th grader ( or their parent or teacher) can go online and print out a parks pass online, and then take it  any national park for free entry.

parkspass

Of course the NPS doesn’t want 9 year old roaming the national park all alone, so the pass allows entry for the 4th grader, along with all other children in the family, plus up to 3 adults.    Do you have multiple children?   You can take advantage of the program for each child, and enjoy multiple years  of family trips to the parks.    You aren’t the child’s primary guardian or caretaker?    No problem.  Any guardian or educator can print off the passes for the kids.    There are a few caveats, but they aren’t overly restrictive.

The program runs from Sept 1, through August 31 of each year. So if your little one just finished 4th grade, get a pass now, and use it all summer.  The other thing is that you must  go online and print out a paper copy of the certificate.   They won’t take an electronic copy.   It might be a good idea to make multiple copies in case you lose on on your trip.

The Every Kid In A Park program encourages kids to enjoy the national parks and the outdoors in general.  Hopefully fostering a lifelong passion for camping and exploring.

Ready to get a free parks pass for your little one:   Just head over to the Every Kid In A Park website.  It takes less than two minutes.


Have you been camping in a national park with your kids? We would love to hear from you. Email us: bison@pahaque.com or contact us on Facebook or Instagram.


Travel Trailer Towing: GVWR, GCWR what does it all mean?

Choosing the right tow vehicle and travel trailer can be a big decision, based on many factors: How much space do you need? Should you choose your tow vehicle first or your travel trailer first? What is your budget? For safety reasons, you should always consider the payload capacity, Gross Vehicle Weight Rating (GVWR), and the Gross Combined WeightRating (GCWR or GVCWR). Exceeding any of these can cause damage to your trailer or tow rig, can be dangerous, and may create extra liability. So what do all these numbers mean?

door stikcer 2

GVWR is the total weight of your vehicle, along with everything in or on the vehicle, as well as the tongue weight of your trailer. This includes passengers, fuel, luggage, and everything else. The brakes, suspension, tires, frame, and other components of your vehicle are not engineered to exceed this number.  You can usually find this number on a sticker inside the driver’s side door.

For example: A 2 wheel drive 2011 Ford Explorer with a 3.5 L V6 has a GVWR of 6160lbs. This means the vehicle and everything in and on it needs to be under that weight. The curb weight of the SUV is 4443 lbs. The curb weight is the vehicle with absolutely nothing in it other than the fluids in the engine, and a full tank of gas. So that leaves you with 1717 lbs for everything else. If you set off with your camping trip with 4 adults, averaging 175 lbs a piece, that adds up to 700lbs. If each adult packs 50 lbs of gear, that adds another 200 lbs. For the total of 900 lbs of payload. You should probably account for another 50lbs of accessories and “random stuff” that winds up in your car, but you are still at 950 lbs and well under the Gross Vehicle Weight Rating for your SUV. No troubles here.


The towing capacity for the standard front wheel drive explorer advertised as 2000lbs But when you have an Explorer loaded up with cargo and people as well as a trailer, you need to be careful that you don’t exceed the GCWR of 6880 lbs.   If you don’t have the original documentation that came with your vehicle, you may need to contact the manufacturer.  If you have the VIN, they should be able to give you the GCWR for your vehicle.

The curb weight of the SUV is 4443lbs, and your cargo weighs 950lbs for a total of 5393lbs. This means that if you tow a 200lb trailer, you’ll be overweight by 513 lbs. Since the GVWR is only 6880, you need to lose $500 lbs somewhere. You need either a lighter trailer, or you need to lose some of your passengers!


The towing capacity of a vehicle can be confusing. The manufacturer of advertises the best case scenario of a nearly empty vehicle towing a trailer. It’s always a good idea to check the Combined Vehicle Weight Rating to make sure your vehicle can safely tow your trailer and your cargo. Most trucks and SUVs should have small sticker inside the driver’s side door panel that shows the GVWR, and GCWR. The best way to truly make sure you aren’t overloaded is to load up your rig and head to a weigh station. Weigh your whole setup fully loaded, and make sure you aren’t overweight.


If you already have a tow vehicle and are shopping for a trailer, load up the vehicle with everything except the trailer and get it weighed first.  Subtract that total weight from the GCWR posted on the vehicle, and be sure that your loaded travel trailer is under that weight.

door sticker 1

The light weight and towability of many teardrop trailers is on of the many reasons  campers choose teardrop trailers like the T@B and T@G trailers or even the Safari Alto  and R-Pod trailers. Some of these trailers come in at under 2000lbs, and still provide many creature comforts.    If you buy one of these little travel trailers. Be sure to visit us for your trailer covers, awnings, side tents, and more.


5 Essential springtime checks and maintenance items for your travel trailer:

Spring is here, and it’s time to get that travel trailer out on the road. If your travel trailer has been sitting all winter there are a few things you should check before you head out. Even if you’ve been camping over the winter, the arrival of spring is a good reminder to check out some of these essentials.


  1. Inspect your tires.: Your tires can lose up to 3 PSI per month. So they should be checked regularly during camping season, but especially after your trailer has been sitting. Low pressure can cause excessive wear, poor handling, and heat buildup that could lead to a dangerous blow out. Your trailer should have a sticker near the front of the trailer that shows that correct tire pressure. Use the pressure on this sticker rather than the “ Max tire pressure” shown on the tire. The manufacturers of your trailer have determined the correct amount of inflation, and filling it to the max allowed by the tire will lead to overinflation, and some of the same issues as underinflation such as uneven wear and poor handling.   This is also a good time to inspect your tires for wear. Tread should be at least 2/32 of an inch deep. There are wear bars on your tires, and if you’ve reached them, it’s time to get some new tires ASAP. But you can also use the penny test. Simply place a penny in the tire’s most worn groove. Make sure you have Lincoln’s head facing down. If you can see the top of Lincoln’s head, the tire should be replaced.

    penny-600763_1920
    If you see the top of Lincoln’s head, replace those tires ASAP.
  2. Clean the roof and inspect it for leaks: Ideally you do this at least every 6 months, and the beginning of spring is a good time. Your trailer roof takes a lot of abuse from UV rays, bird droppings, and more. Missing a leak, or postponing s repair can be very costly in the long run, so better to inspect early and often. Be careful when inspecting your roof, as not all RV roofs are designed to support a person standing on them. Use a ladder to take a good look at the roof, paying special attention to all seams and roof penetrations by items such as air conditioners and TV antennas. If you see any potential leaks, either take the trailer to the dealer for repair, or if you are handy you can patch it yourself. Be sure you use the correct product for making any repairs. There are plenty of RV roof repair products on the market, just be sure to stay away from ordinary silicone sealants like the ones you would use to seal up your bathtubs or windows at home. If you aren’t sure what you are doing, it’s better to leave it to the professionals. Of course you can keep your trailer clean, and protect it from UV rays and pollutants with one of our trailer covers, and that will help keep your roof in tip top shape. But you should still do regular roof inspections, and repair when needed

    camper-933266_1920
    Don’t let this happen to your trailer: Cover, Clean, Repair
  3. Check your battery: If you have a flooded lead acid battery with little caps on top, you should remove the caps and make sure the plates are covered with water. If the cells aren’t covered, add distilled water until the cells are completely covered.  If there are no caps, you have a maintenance free battery and don’t have to worry about adding water. Did you have your battery on a maintainer/ charger? Hopefully, so, as that will help keep your battery in tip top shape. Either way, you should buy yourself an inexpensive multimeter, that can monitor DC voltage. A fully charged 12 volts battery should show 12.7 volts at 100% charge. A battery that is below 50% will only show 12.1 volts. If you have fully charged your battery, and are getting less than 12.5 volts ( 80%) then it’s time to either replace the battery or take it to the shop for further testing.

    device-1298711_1280
    Multimeters are cheap, and help you check your battery
  4. Check your appliances: It would really stink to get to your campsite, only to find out that one of your appliances isn’t working properly. So if you haven’t used them in a few months, be sure to run quick test. Items like refrigerators and hot water heaters that run on LP gas as well as  AC electricity should be checked in both modes. You’ll want also want to run the water pump, heater, and air conditioner to make sure that are all working properly. Don’t forget the LP leak and carbon monoxide detectors, these are the most important of the bunch!smoke-315874_1280
  5. Sanitize your plumbing system. This is actually pretty easy to do, it just takes a little time and some household bleach. We wrote a whole post about it last month.bleach-147520_1280

Do you have any questions or comments about camping or travel trailers? We would love to hear from you. Email us: bison@pahaque.com or contact us on Facebook or Instagram.


How to sanitize your fresh water tank on your travel trailer.

This week marks the first day of spring, and with spring comes camping and a new year of adventures.  And if your travel trailer has been sitting through the winter,  you’ll have some extra prep work to do before you head out on your first trip of the year.   We make tents and shademakers for all manner of trailers,  and some, such as the small teardops may only require a cleaning and a tire pressure check.   But some of the larger trailers, such as the R-Pods and A-liners have a fresh water system that will need to be sanitized.

Luckily,  sanitizing the fresh water tank on your travel trailer is a fairly simple job, and requires only a few household items. You’ll start off my draining your entire  fresh water tank.  Then all you need is a a source of fresh water,some household bleach, and  clean bottle such as a clean empty 1 gallon water, bleach or milk bottle.  You’ll also want to know the size of your freshwater tank, as  that determines the total amount of bleach you’ll add to the system.

bleach-147520_1280

First  you’ll put 1/4 cup of  bleach for every 15 gallons  that your tanks holds, into your 1 gallon jug.   Then fill the  jug the rest of the way with water, and pour the entire contents into your freshwater tank.   Next you’ll fill the entire tank to the top, or almost to the top with freshwater.

Now that your tank is full of the bleach solution, you’ll go inside and turn on all the taps (including the hot water)  until you smell bleach at each tap.  At this point, you know the solution has filled all the hoses and can do it’s job on the whole system.   Once you’ve turned the taps off, your fresh tank should still be almost full, and you’ll want to allow that full tank to sit for at least 3 hours.    Overnight is nice, but you can get away with a shorter time if you’d like.   It’s also helpful to hitch up and take a drive around the block.  This agitates the water in the fresh tank just enough to make sure it covers every nook and cranny of  the tank.  But again, if you are unable to to  the short drive, you should still be fine

Once the bleach solution has done it’s job, you’ll need to empty the fresh water tank, by using the drain plug or by running it through the faucets.    ( Don’t forget the hot water).  Once the tank is empty, you’ll refill it with hot water, and then run all the faucets until you no longer smell bleach.   If you’ve flushed properly, but a mild bleach smell remains, you can flush again if you wish.   The tiny amount of bleach left in the system usually isn’t harmful, and the extra flush is just personal preference.


Have any questions  or comments about camping or travel trailers?  email us: bison@pahaque.com or contact us on Facebook or Instagram.